
The Right Way to Paint Your Apartment in Denver, Co According to an Expert

You may think that you can paint your apartment by yourself, but it is always a good idea to consult with an expert. Painting apartment walls in Denver is not as easy as painting the exterior of a house. When you're living in the space, there are many more factors to consider than just how beautiful it looks. You want to make sure that you don't damage any surfaces or create fumes that will bother you for weeks on end! This article discusses tips and tricks from someone who has years of experience painting apartment walls in Denver, Co.
Painting an apartment in Denver is similar to going out to dinner: you may get a hot dog wagon and finish the paint job quickly, or you can go to a nice restaurant and spend more money. It all boils down to how much time, effort, and money you want to invest. For most people, however, less expensive is better, and that means doing it yourself. Assuming your walls and ceilings are in good working order, here's how to do it the correct way.
Gather the right supplies for your apartment
The first thing you'll need is a good paint brush. Paint brushes usually come in three varieties: flat, angled, and round. The right brush for the job will depend on what type of surface you're painting. You can use a flat brush to paint large areas quickly, or a curved one for trim work. Angle brushes are perfect for getting into tighter spaces, and round ones for edging windows and doors.
You'll also want a roll of painter's tape, a soft putty knife, a container with a lid (like an ice cream tub), and an eye dropper or sponge applicator. Start by taping off any area you don't want painted (including the floor and window sills). You can use painter's tape or masking tape, but make sure it's not loose. Use a putty knife to smooth down any bumpy edges.
Once you've taped off all areas that need protecting, take time to clean your paint wall decals. A clean surface means a smooth, even first coat of paint. Use an all-purpose cleaner and some water to wipe down the painting walls thoroughly, then let them dry completely before moving onto the next step.
Use your eye dropper or sponge applicator to apply a couple drops of white vinegar into a gallon of paint. The acidity in the vinegar will prevent mildew from forming. Mix it well, then pour a few inches of paint into your container and mix again.
If your surfaces have water or mildew stains, invest in a quick-drying alkyd or oil-based stain-killing primer that can also be used as a patching primer (and in this case, a cheap disposable brush or small roller and handle is sufficient). If you don't have any stains, buy a water-based sealer/primer in a flat, matte finish.
Here’s what you should get at the paint store.
- For each new color change, you'll need a nine-inch paint pan and one plastic tray liner.
- One sturdy nine-inch roller handle, one robust nine-inch roller handle, and two medium-nap roller covers
- Paint brush with a two-and-a-half-inch angle
- Before you use Spackle, apply one roll of fiberglass mesh tape to conceal any holes.
- As many plastic drop cloths as you'll need to cover your furniture
- Use two-inch masking tape and nonstick painter's blue tape in a single roll for each layer of paint. (To cover doorknobs, floorboards, windowsills, and other unpainted surfaces that are not painted.) Do not use standard masking tape for this project because you will spend hours trying to peel it off afterward!
- If needed, a quart of spackling compound and two sheets of #120 sandpaper are required.
- If priming is required, a quart of latex primer will be needed.
- A lamp-hanging fixture with a built-in electric light and 100 extra watts of bulbs
Next, we'll look at some items you may already have:
- Flat-head and Phillips screwdrivers
- Plenty of rags
- Plastic quart containers (like the kind soup comes in from a takeout restaurant)
- An extension pole to attach your roller to (your broom handle will work, just be gentle so it doesn’t snap in half)
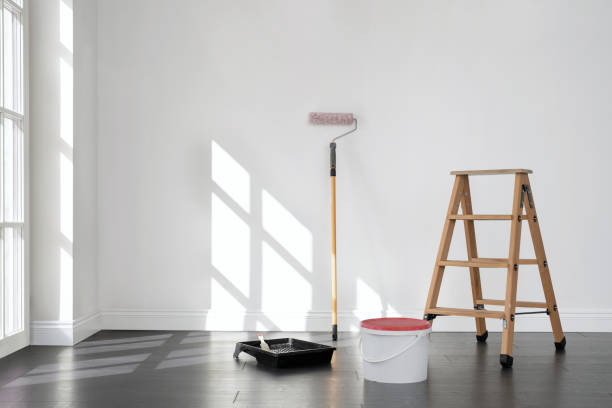
- A stepladder
- Gloves
- Cap, old shirt, old jeans, old shoes; clothes you’re willing to get dirty
- A standing fan
Protect your rental property
You must, of course, protect everything you don't want damaged (which means your desktop computer, the desk, the flat-screen TV, and so on). If possible, prepare the night before so that you're ready to begin work early the next morning.
Move all of your furniture out of the room, or, if you live in a studio, fill it with everything in the middle of the space, leaving at least a body-width distance between your stuff and the accent wall. Then cover your belongings with plastic drop cloths and tape them to the floor to prevent wind from fans or windows (which you should leave open) from blowing droplets into your clothes or on your furniture.
If you don’t have drop cloths, use old bed sheets to cover everything. Make sure the fabric has no holes in it and is clean so paint doesn't seep through onto anything else! You should also tape newspaper over window sills, door frames and light switches before you begin painting.
Then, cover the surfaces you don't want to paint. To mask off doorknobs, hinges, and floorboards, use blue painter's tape. Cover the floors with newspaper or sheets after that. Remove all light switch and electrical outlet coverings so you can quickly locate all screws and covers when you're done. This is a time-consuming paint job, so make sure you don't forget a single inch!
If necessary, tape down your lamp-hanging fixture and other hanging light fixtures before painting the walls. If you have cracks, holes, or wall damage, now is the time to repair them. Use your putty knife to mend any wall breaks and then apply your fiberglass tape (following the manufacturer's instructions). Fill any gaps with Spackle using a putty knife. Do several light coats of Spackle rather than one thick coat. If you add too much, you may find that your paint doesn’t cover it.
Start smart and finish in good time
Begin by donning your gear. Put on your gloves and painting clothes. Gather your rags and step ladder, as well as all of your equipment. Set the fan to a low setting and open the windows before you begin. The ceiling is the most difficult part of the task because it involves movement. Many individuals leave the ceiling till last since it is the hardest part, but you can cut this process in half if you work on it first.
Pour the entire contents of your first gallon can into your quart container until it's about three-quarters full. Try to resist the urge to fill it up or underfill it; it should feel balanced in your hand as you carry it around the room and up and down ladders. About an inch of paint with a brush should be enough to cover a four-by-four area.
Before you begin, take your stepladder and position it at the opposite end of where you'll start painting of your apartment so that when you get there after starting from the other side, all of your paint color will have been used up without any waste by going back and forth across the room.
Begin by brushing the ceiling and wall junction, working your way around the living space. Brushwork takes much longer than rolling, so don't be impatient if it appears to take a long time. When you roll, the work will go considerably faster. Make sure to utilize a brush for any places with particularity required. Before you start rolling, make sure to wipe the ceiling with a brush to ensure there aren't any pockets or roll marks, which can show up later.
More Tips From Professionals Painting Company in Denver, Colorado
- Don't shop for paint before 10 a.m. or after 4 p.m., because you'll be stuck in line behind all of the contractors.
- If you're not sure about the paint colors or need to shop the day before painting, it's a good idea to do so. It can take some time to choose, buy, and transport supplies.
- Never leave a tool or paint bucket on a ladder; you might forget it's up there, and when you move the ladder, everything comes down with it.
- Immediately clean up any paint splatters or spills with a pail of warm water and a cloth. The longer you wait, the more difficult it is to remove it all. Avoid making mistakes in the first place by keeping your concentration on your job.
- If you go somewhere else for more than a few minutes, wrap your brushes in aluminum foil and cover the paint pan with plastic. Otherwise, it will dry out and leave tiny fragments of dried paint in your pan.
- If you have a curious dog or cat, put them in the bathroom and shut the door while you work.
- The finer dust from Spackle should not be vacuumed. It's finer than household dust and will seep through the filter of your vacuum, killing it immediately. To clean up, use a sponge and soapy water. You may need to mop more than once due to spills or other issues.
- Don't toss your paint cans in a garbage bin. Check with your community to see if there's anything you need to know about disposing of empty paint containers. Many communities have rules regulating the disposal of paints and other painting supplies.
- Put your phone away and keep it hidden unless you want paint on it.
Looking for exterior house painters or apartment painters in Denver? Look no further than Harmony Painting of Denver Colorado! The most trusted apartment painters around and have been providing homeowners with an unparalleled level of quality since 2010. Our house painting crew is made up of industry veterans who take pride in their work and always strive to deliver top-notch results – guaranteed! For more information, visit their website at https://harmonypaintingdenver.com/denver-commercial-painting-services/apartment-painting/.